This is the second of our scrap blog posts from Gabrielle from Bibbity Bobbity Buttons. In it she talks us through how she used the leftover needle cord left over from her review of the Beryl Bomber Dress. She has done such a great job of using up all her remnants, I'm really not sure how there could be anything left of her scraps apart from a little pile of fluffy dust! She has ended up with a delightful purse with a little bit of a treat on the inside. Thank you Gabrielle for creating this lovely purse and sharing with it us, we hope it has been in heavy rotation! So with no further delay, read on to find out more...
Petal Pouch
By Gabrielle of Bibbity Bobbity Buttons 
While a way to deal with the scraps of the rib-knit came easily to me, it took a while longer to know how to deal with the leftover Rose Pavilion needlecord (this has now sold out, but there is more corduroy on the Miss Maude website). The fabric is soft and lovely but not particularly robust, and a lot of the early ideas I had ended up on the cutting-room floor because I wanted a project that would honour its qualities.
It was when I was due to go on a sewing retreat and in a mad flap of last-minute packing that I realised the thing I really, really, really needed was a tools and notions pouch, and the fate of the needlecord was decided. Teamed with some leftover denim from my stash for the outside of the pouch, the needlecord would be the pouch’s lovely, soft insides.
While chatting to Emma from Miss Maude about this plan she suggested the Petal Pouch by Anna Graham from Issue 1 of the ever-so-luscious Making Magazine, Flora. These magazines are beautiful and collectible, brim-full of all sorts of crafty projects from knitting to sewing, from cooking to mending and so much more besides!

Making the Pouch
As my first ever bag-making project, the Petal Pouch was a good place to start. The pattern offers two sizes of pouch, of which I made the larger size. It was very easy to follow, and produces a charmingly-shaped little pouch that’s big enough to accommodate all those things you might need to take on a sewing mission. Emma supplied a great-looking metal-toothed YKK Cayenne zip that perfectly matches my rusty rib-knit, of which I still had a few bits leftovers, and a few more ideas up my sleeve for.
As everyone will agree, pockets! Pockets for all and everyone! Pockets for everything! Including a tools and notions pouch! Therefore, after I had cut out all the pieces for my Petal Pouch, but before I stitched everything together, I took the chance to add to it a couple of internal modifications to keep everything a little more orderly.
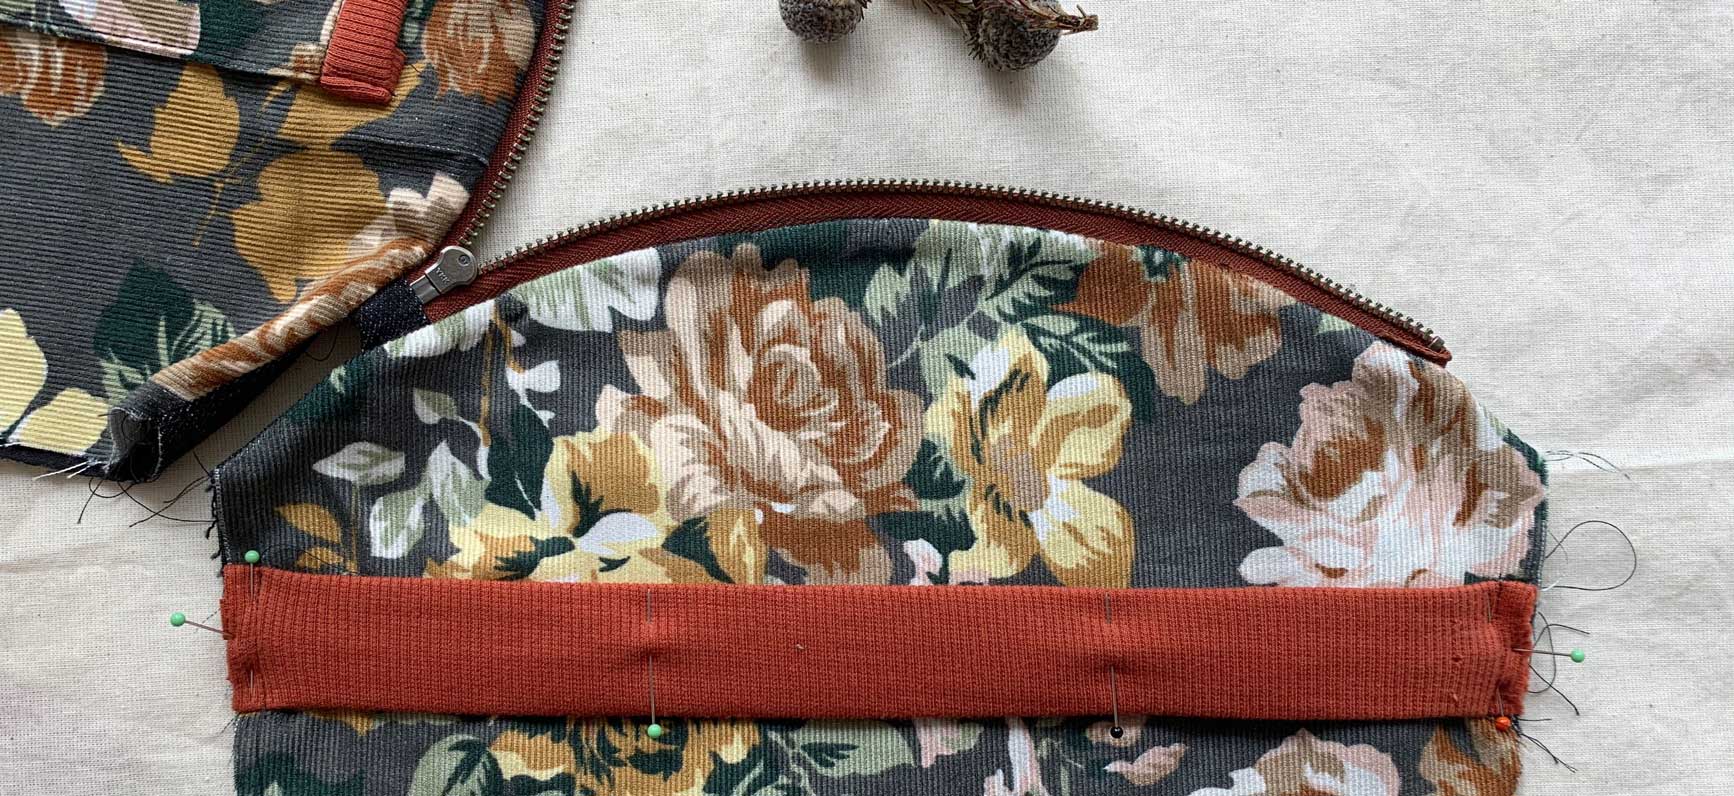
On one side I added a 4” x 4” pocket (for the safe-keeping of thimbles and other easy-to-lose things) which I bound the top of with some of the rib-knit. I used a little bit of negative ease to keep the pocket sitting closed when it has bits and bobs in there.

For the other side, I made a tube of the rib-knit to make a band for the other side, into which I can slide things like needle-packs and snips. Similarly, I used the negative ease of the rib-knit (making the band shorter than the length of the lining) so that things will sit reasonably securely in the band. I portioned this band into three sections, stitching it to the lining in two different places to make separate compartments. And finally, rather than using another material for the loop, I used the selvedge of the denim, and I made it significantly larger—a proper handle for ease of grabbing!
 With all the negative ease from the rib-knit, the lining gets pulled in on itself. I fixed this by adding some embroidered stars to the pouch, thus anchoring the lining to the shell. Tighter constellations of stars have formed around those areas that needed the most anchoring, and I think they look very cute.
The Final Result
The Petal Pouch is a very satisfying little project. It’s great for using up small remnants and makes for a stash-busting project that is genuinely useful. The needlecord is very lovely to have my hand brush up against as I retrieve things from inside the pouch, and my pocket-additions truly delight me! My one regret is that I messed up the zip placement. It should obviously be centred at the top of the pouch, but I misread the instructions. However, as this was my first time bag-making, I’m putting that down as a rookie-error and will know better for next time. And speaking of next time? I think this bag needs a mate, and I still have a morsel of Rose Pavilion Needlecord left over for a small Petal Pouch.


