Written, made and worn by Emma
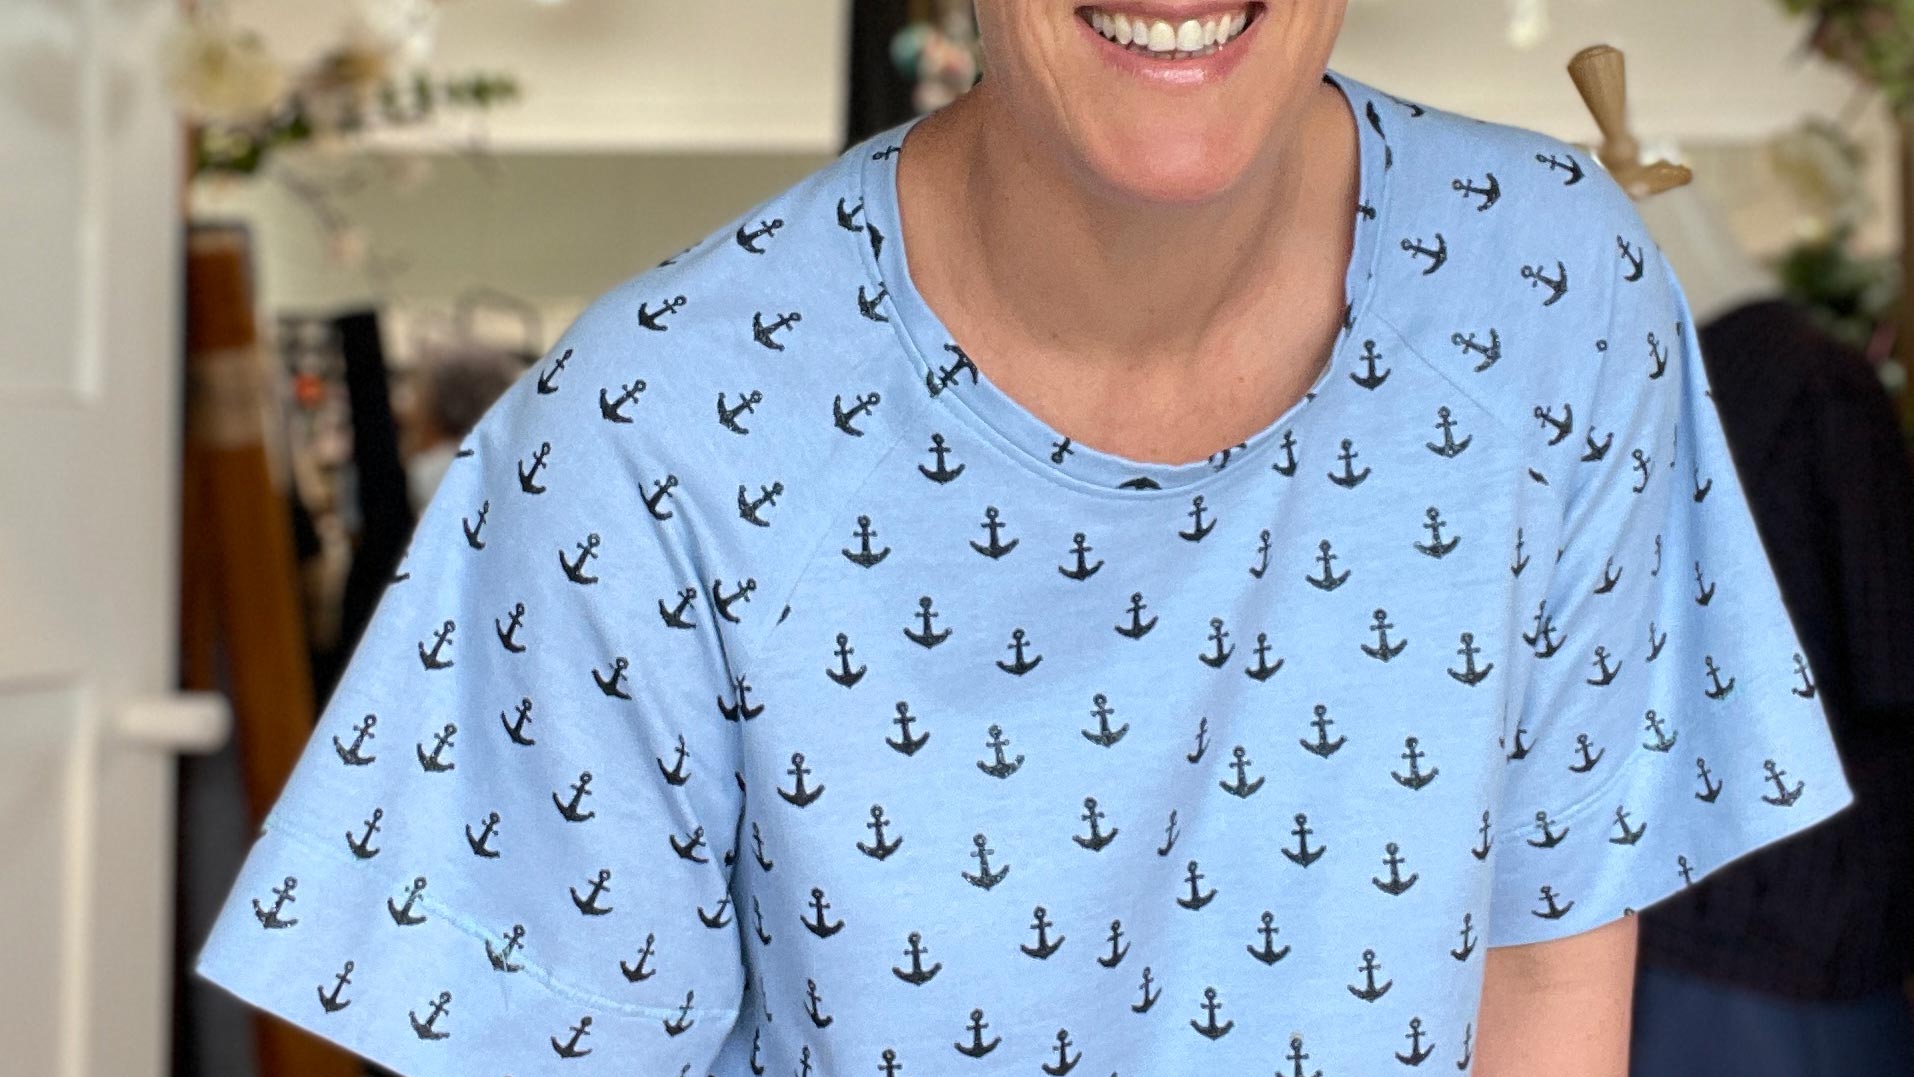
I made this top as a little end of year, pre Christmas stress relief. Instead of cooking dinner for the troops and the usual evening chores, I left them to fend for themselves and whipped up a summer tee! I've had my eye on this pattern for years....(the biggest hazard of owning a fabric and yarn store is having a wishlist of makes a mile long - literally!). Anyway, with these cute Anchor Print jersey knits arriving in store, the time was right.

The sewing pattern used is the Aeolian Tee from Pattern Fantastique - boxy with raglan sleeves. In my view it is just the right shape for a summer of comfortable and casual basics. There are deep 6cm hems on the sleeves and bottom of the tee which makes it hang nicely and elevates it above a simple tee. The result is just as I imagined - perfect for showing off the print which has the added fun of glitter anchors!

Pattern - Aeolian Tee by Pattern Fantastique
Size - Medium
Emma's bust = 97cm
Modification - lengthened sleeves by 6cm
Fabric - 1.2m of Anchor's Away Jersey Knit fabric. (150cm wide)
Notions - thread, light weight knit interfacing, hot hemmer, jersey/ball point sewing machine needles
Skill Level - Beginner Plus
Maker - Emma
Skills Used -
REVIEW
Pattern and Instructions
The sewing pattern includes options to make a tee, tunic, a midi or maxi dress - so you can make this pattern work hard for you, with a whole host of comfortable garments to see you through the summer!
I made one modification to the pattern - lengthened the sleeves by 6cm. This is on account of having fairly broad shoulders which in turn usually makes sleeves shorter than intended.
The instructions are relatively straight forward, although I felt that the instructions for the neck band seemed a little complex. They have been written so that you determine the length of the neck band based on how much stretch there is in your fabric. This is valid, but it does require a little bit of experience and/or experimenting and basting to get the length correct. As I had just the one evening to make this, I didn't baste the neckband first to test I had the correct length - and it turns out I should have made it a little bit shorter. You can see in the image below the it gapes a little at the front neck.

Back Facing
There is a back facing that gives the tee a little structure and is a nice detail. A little lost with this print, but would add interest to a plain coloured tee.


Hems
The hems are all 6cm deep. I'm always a sucker for a deep hem - it gives a little extra weight to help with drape and to me they feel a little bit fancy as you don't normally see deep hems on ready to wear garments.
Fabric - Jersey Knit
This is a 200gsm single jersey fabric - a lovely quality and weight for a tee to last but without being too heavy to wear throughout the heat of summer. The print is a little bit special with glitter in the printing ink. We currently have this available in three colourways. We also have a number of other prints in similar quality jersey knit fabrics and also our Go To Organics Jersey Knit range which would be a great option for this tee.

While the jersey rolled at the edges once cut, it wasn't too unruly and I found it easy to pin in place before sewing seams. I used longer pins which I find keeps things flatter and easier to sew. Our mid weight flower head pins are ideal for this.
Sewing jersey knit fabric - Only one pin and one needle were harmed in the making of this top......more on that in a moment!
If you have an overlocker and cover stitcher, you can whiz through this project quickly - perhaps making a family of tees in one evening! Given that many of us don't have these, or in my case I avoid my overlocker as much as I can, I sewed the tee on a mid range domestic Janome sewing machine.
To achieve a nice result sewing knits fabrics on my standard domestic sewing machine I do the following:
- Use a ball point, stretch or jersey needle. These are designed to slip between the thin yarns of your fabric so as not to break any - which may lead to the knit fabric getting ladders in it. For this fabric I used size 80/12
- Set my stitch length slightly longer than normal and with a slight zig zag. This allows seams to stretch slightly. Great for a project like this, but not quite enough stretch for a figure hugging garment/activewear. For my machine I set the zig zag width to 0.5, and the length to 3mm

- Ensure I keep your fabric edges aligned when sewing (I use more pins than I usually do) and that the top and bottom layer of fabric feeds through evenly. - You may need to use a walking foot to achieve this and/or try lowering the pressure on your presser foot.
- I didn't finish any of the seams - the knit fabric won't fray which I love! For the raglan seams and around the neck I pressed the seams, topstitched then trimmed excess fabric from the seam allowance around the neckline. Note - press raglan seams up towards the sleeve.

- Hemming and sewing in the back facing - this is an ideal job for a cover stitcher if you have one, but I simply selected a similar looking stitch on my sewing machine and ran with that - I made sure the stitch had some stretch in it. I had to narrow the width of the stitch a little bit because at full width it was pinching the fabric together giving a 'railway track' effect. A thicker, more stable knit would have coped with a wider stitch better.

- Straight hems - I was sure to be accurate pressing and pinning up my hems (a hot hemmer is my favourite tool for this!). And I used quite a few pins to keep everything in place. But, don't be a me - remove your pins before you sew over them!!!


- I sewed the hems from the right side of the fabric - with such a deep hem I place washi tape on my sewing machine to mark where to line up my fabric.

- Press all seams and hems as I sew them. Straight off the machine they look a little bumpy. A good steam press - up and down, not dragging side to side - flattened everything out nicely.
- If there is any excess fabric once I've sewn my hem, I carefully trim it back to the stitch line on the inside for a neat finish. Duck bill scissors are perfect for this job.
- Always test on scrap fabric first!
Conclusion
I'm definitely pleased with the results, and keen to make a few more as I have some jersey knits in my stash that I'd love to use. Next time I'll just take a little extra time to make sure the neck band is a slightly shorter length. There is plenty of ease in this design, so a woven cotton lawn or double gauze version could be a nice option too.
SAVE IT FOR LATER....


