Sewing thicker seams, for example on denim, canvas or wool can sometimes result in uneven stitches, especially when going over seams. However there is a simple way to combat this - a hump jumper and it does exactly what it says on the tin! Jumps those humps!
Depending on what type of machine you have, you may well have a funny little tool in there to do the job for you. This one is made like a fan so you are able to either use one layer or three depending on the thickness that you need.
 However if you don't there is a very simple, cheap DIY trick to help, a wedge of cardboard!
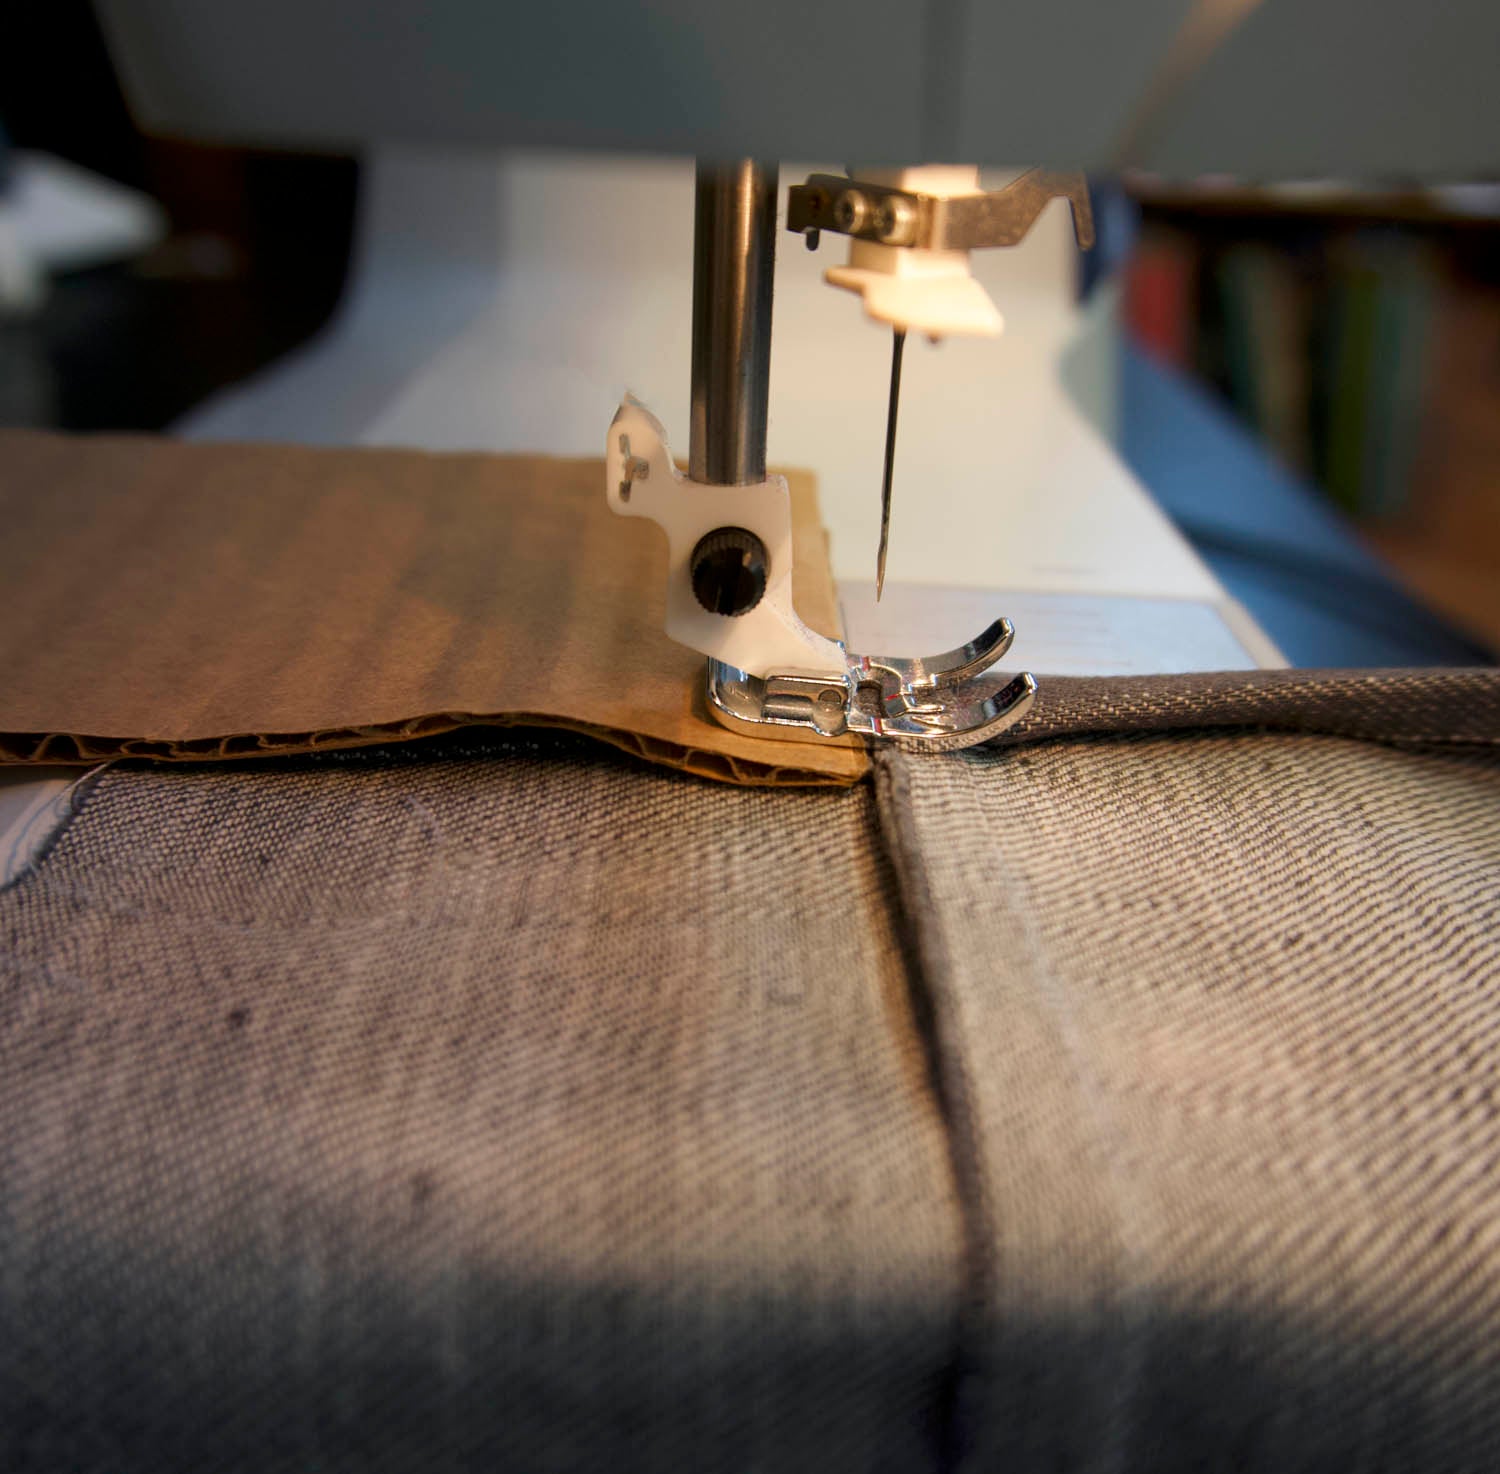
When you place an item with a thick edge under your sewing foot it can often look like this. This can result in uneven stitches at the start of the seam. This is where the hump jumper comes in handy, by wedging it up at the back it levels out the foot and allows the machine to sew even stitches.

Simply wedge a piece of card at the back of your sewing machine foot to make sure that the foot is flat.Depending on where the bulky seams are you may also need to move the card or hump jumper to the front of the foot to ensure it stays level.
Just ensure that the card is always behind or at the side of the needle, you don't want to risk damaging your machine. By placing the card to the side of the foot, it helps to ease the foot off the sewing, to keep the foot level and to keep the stitches even. Remember to keep the cardboard away from the needle!
This is the method we use, but we always recommend that you try any of these methods first on a scrap piece of fabric.

