23 March 2021, By Caroline

Wool and Wax Tote, Issue 2 - Making Magazine
When I was researching (research is the wrong word, really it was having a lovely time flicking through some pretty gorgeous magazines) for projects that would be useful for leftover fabrics, I came across the Wool and Wax Tote. I have never sewn with oilskin fabric before and this seemed like a really good beginner sewing project for me to test it out.
The Pattern
The pattern is the Wool and Wax Tote and can be found in Issue 2 of Making Magazine Fauna.
The pattern is described as ‘a classic tote that will look great with anything and keep your must have essentials close at hand’. There is a dividing front pocket which is perfect for stashing keys and a phone.  I‘ve sewn from other magazines before and had not been that impressed with the level of detail, so was a little sceptical about how these pattern instructions would be. Coupled with the fact that I have not made a bag for a while (since school, a few years ago!) I was a little intimidated. However the instructions were really clear and had some great tips for sewing with oilskin (or wax canvas as they refer to it). I would recommend this as a great starter project to either sewing a bag or oilskin.
The magazine also has some other lovely sewing and knitting patterns which are perfect for makers. You can see pictures of projects that are in the magazine on our website. There are some embroidered hand puppets which would be adorable for my niece and nephew that I also have on my wishlist!
You Will Need:
(These amounts are based on 115cm wide fabric and are the recommended amounts listed in Making Magazine. If you are using a wider fabric you will need less.)
- Strap - 2m of the Trinian Merlot
- Main Exterior Fabric - 70cm. Unfortunately we have sold out of the main fabric. You could use any of our coating fabrics for the main fabric.
- Contrasting base - 50cm. We used the Hawthorne Tartan Oilskin Fabric.
- Lining Fabric - 1m. We have since sold out of the Mulberry Poplin but any of our Poplin Fabrics would be suitable.
- 1m of the Woven Interfacing.
- 1 packet of the Double Headed rivets
The Fabric

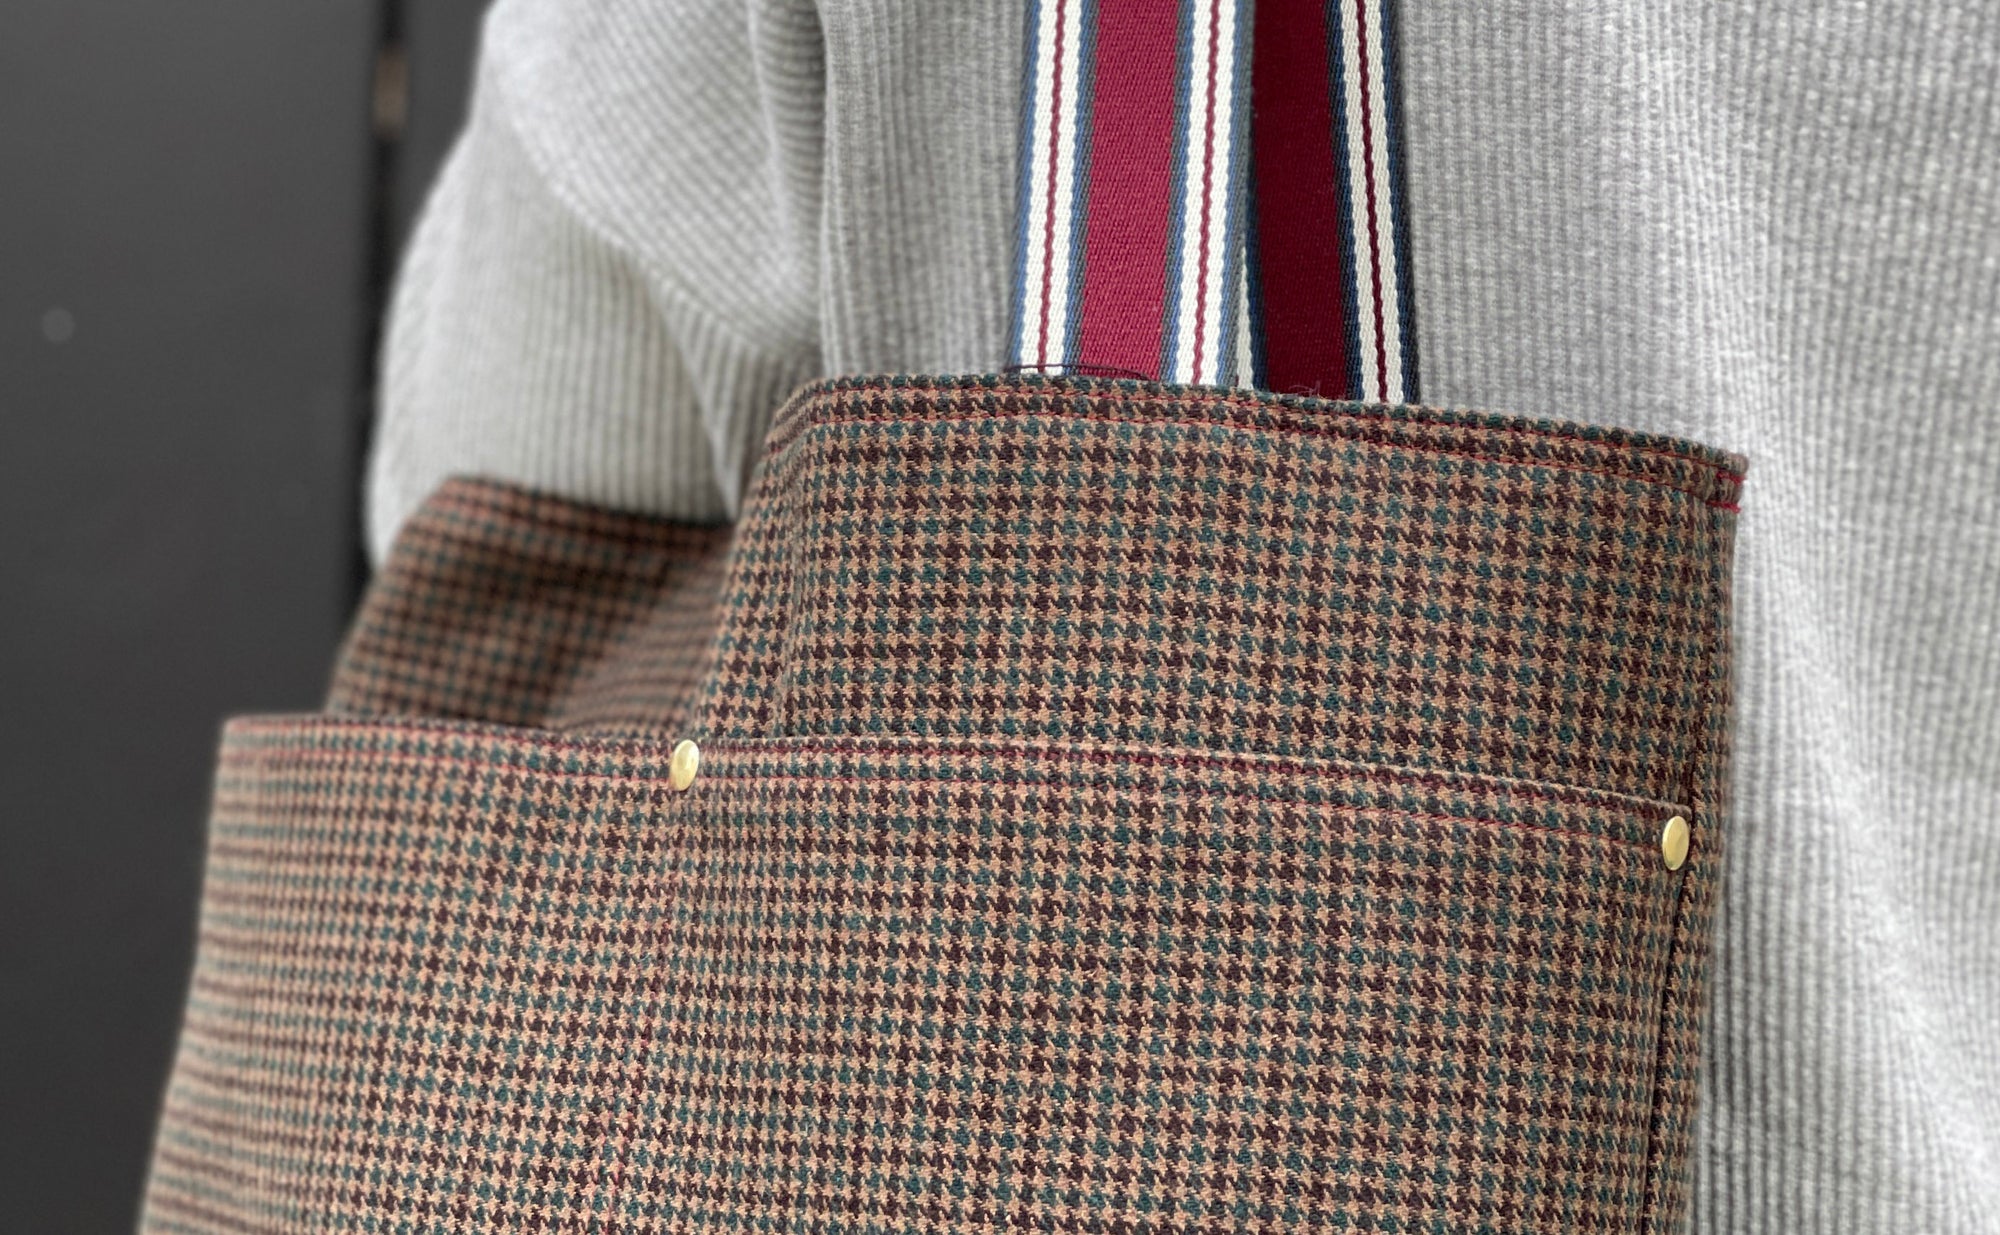
For the project I used the Plains Houndstooth Wool for the exterior fabric and the Hawthorne Tartan Oilskin for the contrasting bottom fabric. Oil skin needs a barrier lining to protect your belongings from the slight residue that can transfer. For this project I used the Organic Cotton Poplin in Mulberry as the lining. The poplin has a really nice tight weave and after it has been interfaced it will provide more than enough protection.
However when it came to the handle, it was tough to make the decision. The pattern suggests using a leather handle or cotton webbing. We have a variety of webbing and tapes in the store and I tried all the ones that I thought might work. The leather strap seemed to dull down the fabrics, it all blended together and was ok, but not quite good enough. I ended up (after asking EVERYONE working that day) choosing the Webbing - Trinian Merlot. It highlighted the merlot colours in the oilskin and tied the colour of the lining and the rest of the bag together.
  One word of warning. The fabric requirements are based on 111cm wide fabric. I used fabric that was 140cm wide which left quite a bit left over. I could have got away with not getting quite as much.
If you are making it from the same fabrics as I have, I think you could get away with 50cm of the main exterior fabric. And 1m of our Midweight Woven Interfacing.
Please remember to check if your fabric needs pattern matching as you may need more or if it is a thinner width than 140cm.
The Make
The instructions were clear, the diagrams were well laid out and there was no confusion. The bag came together quite quickly apart from the one mistake when cutting out, I didn't pay attention to the mantra 'Measure Twice, Cut Once'. But luckily it wasn’t the end of the world. And I will do something with the extra fabric. Maybe a little make up bag to pop in the bag as well.
Sewing with oilskin was very satisfying. It doesn’t need pressing with an iron. Look at this seam that pressed using my finger! I did have to unpick a seam at one stage because the side seams didn’t match up, it gives a good idea of what oilskin looks this like when it's been sewn on.
  You can reduce the appearance of the needle marks a number of ways. We have done some through test which you can read about on this blog post Oilskin FAQs.
These marks will also occur if you use pins on the fabric, I avoided this on this sewing project by using Fabric Clips. They are sturdy clips which keep the fabric together without leaving a mark. I prefer them too pins because you don't get a distortion of fabric and I find it more accurate when sewing the fabric. Especially for when matching obvious seams. To insert the rivets, I used our tutorial on How to Install Jeans Buttons and Rivets. It took a few tests and experiments to get it right for this bag. I used the Double Headed Gold Rivets and trimmed them with wire cutters at the little dent they have on the stem. I also tried a few different ways to get the stem through the fabric. What worked the best was using the Leather Punch and Jean Press Tool and really hit it hard with a hammer (i was a little too tentative to begin with). In this case, using an awl didn’t work as it doesn't make the hole big enough through the layers of wool, interfacing and seams. On the last rivet I got it right, the first one took me about 10 minutes to get through, the last one about a minute! I’m glad I persevered because they add a lovely finish to the bag and help top highlight the pockets.
One word of warning. Make sure that the rivet with the stem is the one on the outside, when you trim it and hammer it, it leaves marks on the cap that are hidden in the lining. You wouldn’t want these to be on the exterior of the bag.  Overall I am so pleased with how this bag came out. I love the combination of fabrics and handles and the oilskin gives it a really crisp finish. A lovely project from start to finish!

