Written by Emma
It's always exciting to receive new fabrics into the store, and our latest delivery from Japan was no exception. As boxes and bolts get unpacked, our minds become awhirl with project ideas - some simple, other not so!
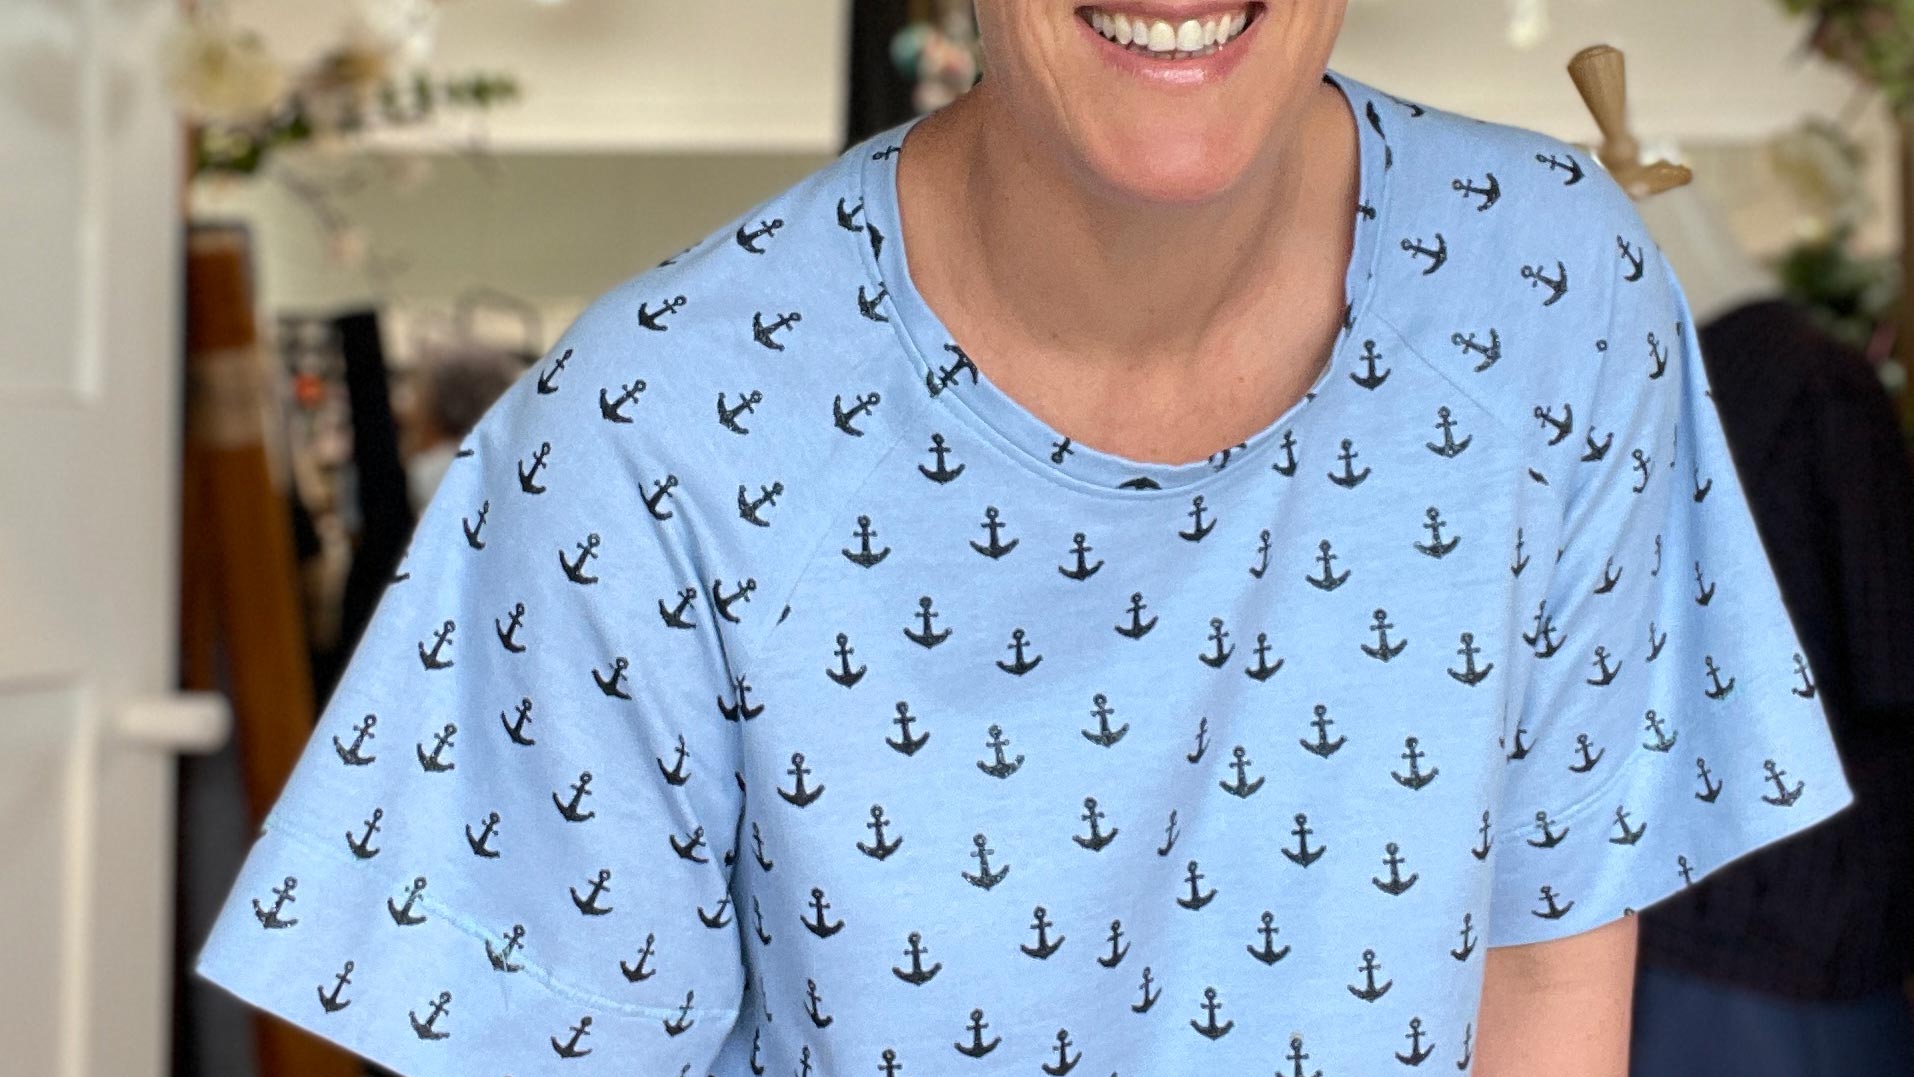
With the reality of time constraints when working full time and still making it to the kids swim club on time (!), I decided to whip up an oversized tee-shirt. Something to show off the graphic design of our Botany print while also being comfortable and cool to wear with our current hot and humid weather. 
I choose to use the Array Top as it's really simple and I love its oversized shape. This is a pattern that has a lot going for it and one that I often recommend to customers - both experienced makers and those just starting their sewing journey. Here's what I love about it:
- You don't have to worry too much about fit due to the generous amount of ease in it
- It comes in extended sizing - so fits most
- It's quick and easy, and quite possibly the easiest garment pattern we have so excellent for beginners
- It's a great base shape to use for manipulating to your own style preferences (for those of you with a little more experience sewing)
- You can make it with both knit and woven fabrics
- Make it for just about any occasion - from a casual knit for an oversized nightshirt, right through to a dress version in something glamorous (such as our Reveal Linen Viscose) for a black tie event! Check out the following tags for some great inspiration: #arraytop #arraydress

Pattern - Array Top (altered the sleeves to be short)
Size - 3 (made for Emma who has a 93cm bust)
Fabric - Botany Japanese Cotton - Orchid colour way. 108cm wide - I used 2.1m . Plus 10cm of Corded Cotton Rib in black
Skill Level - Beginner
Maker - Emma
Skills Used -
- straight sewing
- french seams on all seams
- stretch rib on neck edge
- altering the pattern - shortened sleeves
The first thing I did was alter the pattern for the sleeve to shorten it. Because it is a flared sleeve, you need to make a slight alteration to ensure the hem sits nicely when stitched. See our tutorial on how to shorten a flared sleeve.

Once this was done, it was very straight forward, cutting out pattern pieces and sewing it all together. I used French Seams throughout. To make life easier (hey - running on a tight schedule!) I didn't bother adding any extra to the seam allowances when I was cutting out my fabric (nor did I worry about pattern matching the print). I figured the simplicity of the pattern shape and the generous ease would allow me to get away it.
For the neck line I used the 'knit neckline' pattern piece. I used our Corded Cotton Rib in black, and attached it by marking quarters in the rib and matching that with the centre back, centre front and each shoulder seam.
I choose to add 6cm deep hems to both the sleeves and bottom hem - I like this look for the boxy nature of the top. With a little topstitching, I was done. Easy! A complete make in just a couple of hours.


SAVE IT FOR LATER....