Written, made and worn by Emma
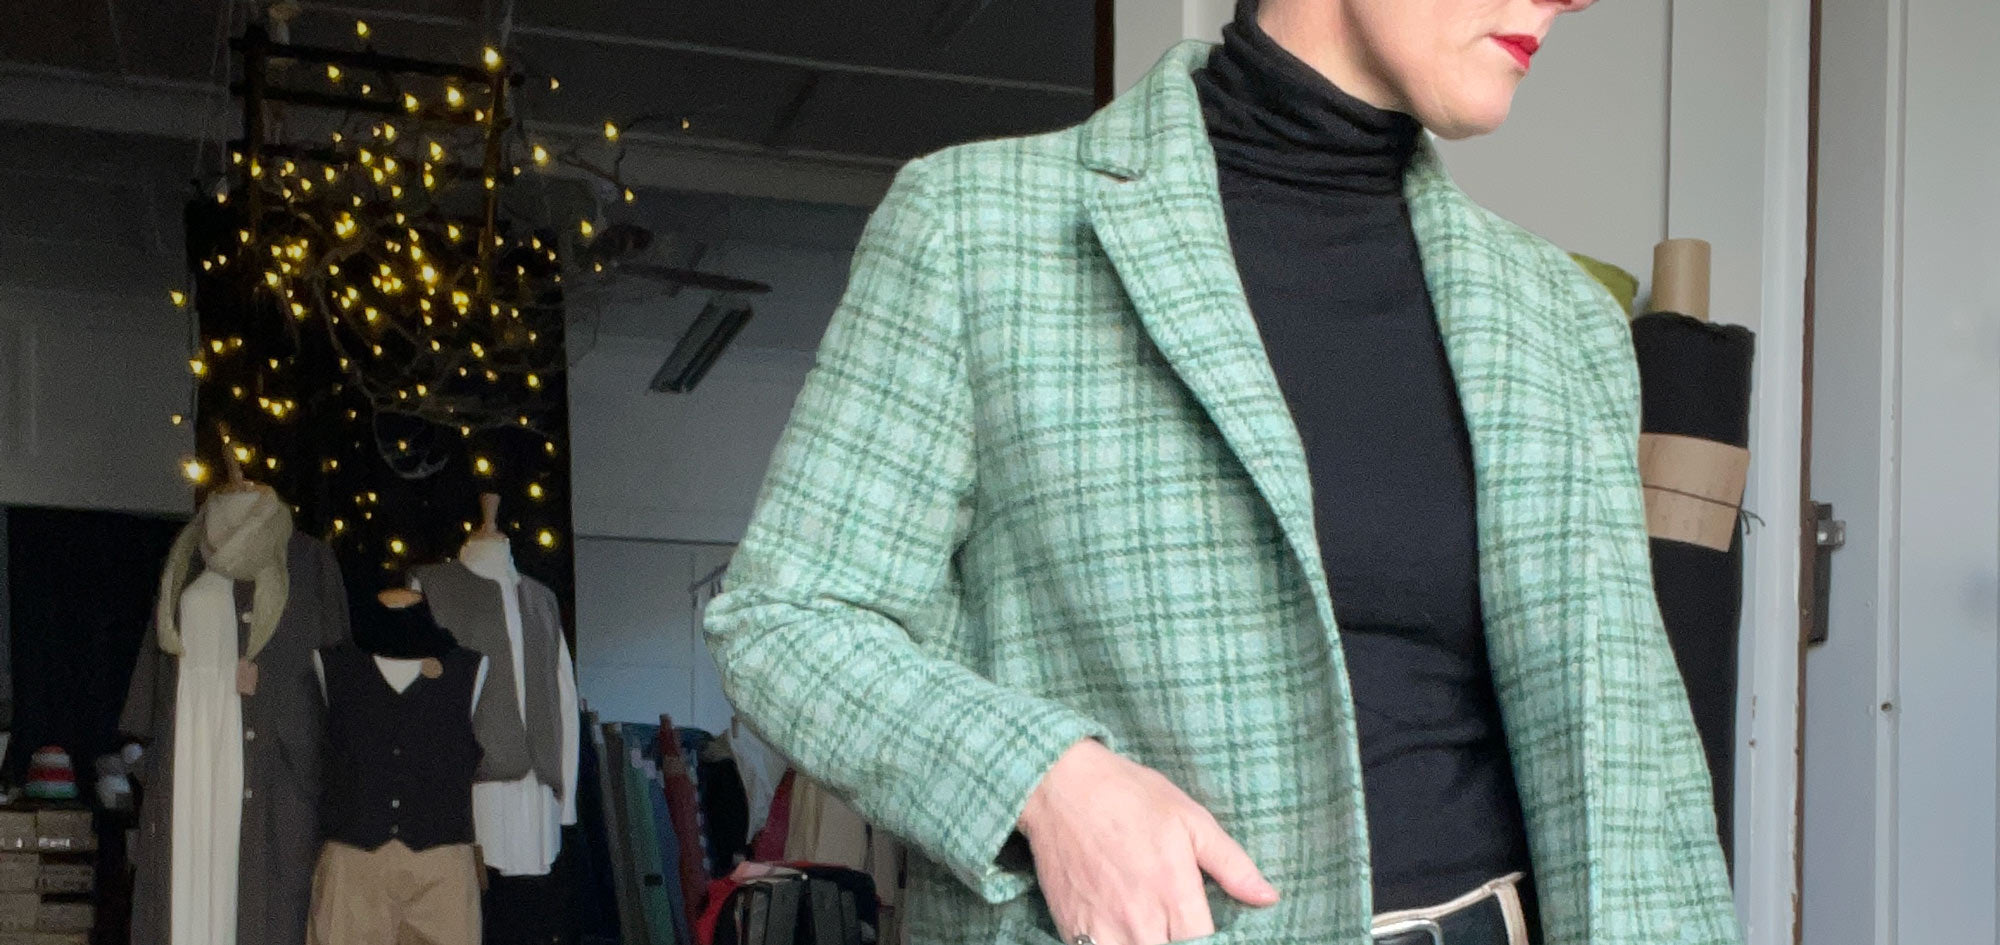
With the depths of winter demanding a bevy of warm layers, sewing a woollen blazer seemed like an obvious choice after receiving a beautiful collection of limited edition Yorkshire Tweeds. With the unpacking, I quickly cut a length off for myself and have been slowly working on the Heather Blazer over the past couple of weeks.

The Heather Blazer has been designed as a great entry into the world of sewing blazers, and I couldn't agree more. The fit is relaxed and the tailoring simple. Making for a relatively quick project for this style of garment. Double thumbs up from me!

Pattern - Heather Blazer, Friday Pattern Company
Size - Large. Emma's Bust = 96cm
Fabric - Wool Tweed Coating with Viscose Lawn Lining. (we no longer have these fabrics available, but you can see what we currently have in stock here: wool fabrics and lining fabrics)
I used 2.1m of the main fabric and lining fabric - at 150cm wide, this is 10cm extra than the pattern called for to allow for pattern matching the checks.
I used 1.4m of the viscose lining at 140cm wide.
Notions -
Thread
Woven Mid Weight interfacing
Mid-weight knit interfacing
Just So Shank Button in Khaki Green
I also added shoulder pads and sleeve foam roll, however these were an optional extra that I chose to add.
Tools -
Tailor's Clapper
Walking Foot for my sewing machine
Skill Level - Intermediate
Maker - Emma
Skills Used -
- Pattern matching patch pockets
- Button hole
- Fusing/Interfacing
- Adding a lining

REVIEW
Fit - I made a size large using my bust measurement as the guide (96cm). I added 7mm width to the shoulders - this is a standard adjustment that I need to make for most garments.

The main body is boxy with only a little shaping, while the sleeves are two piece with a more slender fit. Given that I lift bolts of fabric for a living, I find that the sleeves are a little more slender than ideal for me. The blazer fits well and is comfortable with a shirt or single layer merino, but starts to get a bit tight on the arm if wearing a jumper. In saying that, the blazer is wonderfully warm, so doesn't need much layering underneath.
 If I make this again (which I probably will in linen for summer), I will add a little more ease to the sleeves.

Fabric - Pure wool fabric is a treat to sew with. This particular tweed is a relatively tight weave, so the fabric is stable and easy to handle. At 280gsm, it is about as heavy as we'd recommend for a blazer. We do have heavier wools in store, but they would be better suited to a coat where there tends to be a little more ease to cater to the heavier fabrics.
Pre-washing: This fabric comes with a Dry Clean only recommendation from the mill. Because of this, I didn't pre-wash the fabric - instead I steam pressed the entire piece before cutting out. This was to remove any shrinkage that might occur. During construction all seams get well steamed, so I didn't want any surprises at that stage (I've learnt this lesson the hard way!!).
Construction - The instructions are clear and really do take any apprehension out of sewing a blazer for the first time. There is also a link to a really helpful video on how to sew the lining at the hem for a neat finish.

As I was sewing with checks, I wanted to pattern match. I used a walking foot on my sewing machine to help with this - this really does make a big difference, especially with thicker fabric such as this Yorkshire Tweed!
 I wouldn't be without my Tailor's Clapper for this project. They are great for achieving wonderfully flat seams without the risk of scorching the fabric. Using a clapper really does elevate the finished result. We've written a blog post going into detail on what exactly is a Tailor's Clapper and how to use it.

The pattern recommends woven interfacing through the front of the blazer, back shoulder and under collar, and knit interfacing for the facing and top collar. I feel like the blazer is quite stiff through the front, and if doing it again with a wool fabric like this, I'd used the knit interfacing on all pieces that need it. This would result in a slightly softer look at the front of the blazer.

Additions - I decided to add shoulder pads and sleeve roll foam for a slightly bolder look. I'm a big fan of defined shoulders....I'm sure there is something in that if you start to dig? Child of the 80's, power suits, feminism, stability...ok, lets not. Back to sewing!

Shoulder pads are not called for in the Heather Blazer, and to be honest they aren't really needed in this circumstance. This fabric is relatively thick for a blazer so I found it held it's shape well on the shoulder. (Unfortunately I forgot to take a photo of the blazer before I added the shoulder pads for you to see).

Shoulder pads help to define the shoulder, and in combination with the sleeve roll foam, they help the fabric at the top of the sleeve (the sleeve head) to sit nicely. The sleeve roll foam gets stitched into the seam allowance at the sleeve head.

Shoulder pads and sleeve roll foam can be useful tools in achieving a good fit - even if you are not a fan of power suits! The shoulder pads we currently have in stock are not too thick, so only give a subtle lift.

Conclusion - I really like the end result, and keen to give it another go in a lighter weight fabric for wearing in warmer months. We also have a few other blazer sewing patterns available, so very keen to give them a go to compare and contrast. A blazer is a hard working garment - it can be dressed up or down, and can quickly elevate an outfit.
SAVE IT FOR LATER....


